Feeds:
Posts
Comments

Budget food freezer hacks - bonjourHan

We bought our first tiny deep freezer secondhand. We have since been given a bigger one, and I don’t know what I would do without it.

Micro-stocking

I find it hard to relate to money-saving tips where people say, “If you find one of your staples on sale, stock up!” And then they proceed to show you how they dropped $50-$100 on all the extra pork chops they could ever need. I don’t know about you, but I don’t have that kind of “wiggle room” in my grocery budget.

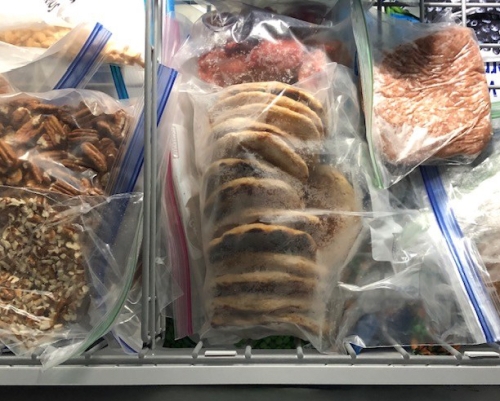
If something is super cheap on sale, you may not be able to “stock up,” but pick up an extra one or two. For me, stocking up looks like buying one extra of something when it is on sale and tossing it into the freezer for later. While it would certainly be nice, I don’t have a massive amount of food stocked up in my freezer. I do have several meals’ worth, though, and that is so helpful. (I still dream of having a side of beef or pork or a pile of chickens stashed away for the year, but unfortunately I haven’t found a way to do that where it actually saves us money.)

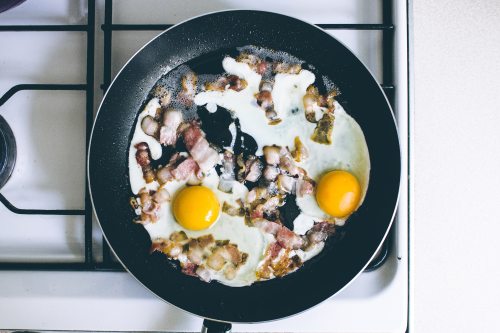
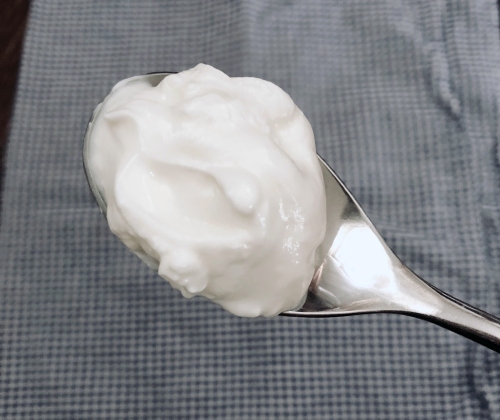
If you’re making a pot of soup, make some extra and freeze it in a gallon-sized freezer bag. If you are tired of eating the pulled pork or taco beef you made a few days ago, put the rest in the freezer. Freeze that last raw chicken breast you didn’t use. (Bonus points if you marinate it first! More on that in a future post!) Freeze the extra loaf of bread you got on sale. Shredded cheese freezes great; if it freezes into a block, bang it on the floor or counter a few times to break it up. You can even freeze milk and butter. (But don’t freeze yogurt, because the texture gets weird.) If something is about to go bad, just freeze it!

Some years I can’t find any, but I try to buy turkey on sale after Thanksgiving or Christmas. I’ve bought large whole turkeys for $3-$6 EACH before. Roast it in the oven with some simple seasonings (you’re not going for Grandma’s famous brined showstopper here). When it has cooled, strip the meat from the bones and freeze meal-sized portions to be used in quick meals later, like when a recipe calls for chicken that is already cooked. Same with ham after Easter (Aldi is especially good about this). Cook it in the crockpot with a few seasonings, cut it into small cubes, and freeze in a freezer bag. Just pull out a handful or two whenever you need it!

Extra items

I’m not going to buy a whole carton of orange juice just because I need a few tablespoons for my recipe. I’m not going to go to the store for limes just because I needed to make some last-minute guacamole or cilantro-lime slaw. The freezer comes in so handy for flavoring your food without adding lots of items to your grocery list.

I keep a can of orange juice concentrate in the freezer. If I need orange juice for a recipe, I just scoop out a spoonful or two of orange juice concentrate and add a splash of water. The can keeps for a long time in the freezer, and I always have orange juice when I need it.

I also get a bunch of limes every now and then and zest and juice them all at once. This is both a money saver and a time saver. The zest lasts a really long time in the freezer, and you can just grab a pinch or two every time you need lime zest or want to add some lime flavor. I also freeze the lime juice in an ice tray then put the cubes in an airtight container in the freezer. Any time you need lime juice, just pull out however much you need. You can do this with oranges and lemons too.

I keep a bottle of lemon juice in the fridge at all times. I use it whenever I need lemon juice, but I also use it if I need lime juice and don’t have any actual lime juice in the freezer. This way I still get the acidic liquid of citrus juice, and then I toss in some lime zest for the lime flavor.

Most recipes require just a Tablespoon or two of tomato paste, so what do you do with the rest of the can? Spoon it into Tablespoon-ish sized blobs (you can measure, but I don’t) onto a sheet of waxed paper or tinfoil or some other nonstick surface and place it in the freezer. When the blobs have frozen, put them in an airtight container and pull them out as needed.

If you are not sure you will be able to use the rest of a sauce or something before it goes bad, freeze it in an ice cube tray and pop the cubes into a container for the freezer. (If you’re feeling especially lazy/efficient, you can just pour the sauce/paste straight into a zipper bag, lay it flat so it freezes into a thin sheet, then break off pieces as you need them.)

Make it to last

I often make staples and freeze them so we can enjoy them for longer.

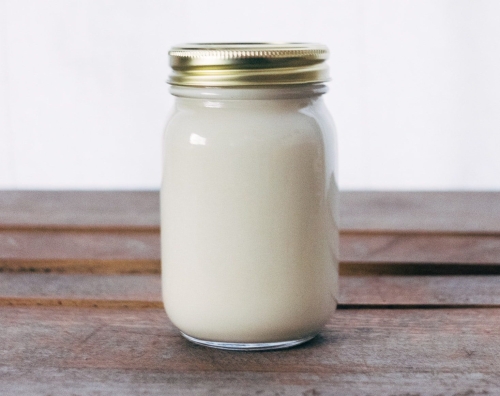
I really want to learn how to can, but until then, the freezer has come to my rescue. I buy lots of apples in the fall when they are cheap and in season, and I make tons of our favorite homemade apple butter. I put it in mason jars and freeze them so we can eat apple butter all year. This is actually the first time in YEARS that I didn’t make apple butter (I simply could not cram it into my schedule this Fall, and I missed my window for super-cheap apple prices). We are bummed, but surely we can adjust to buying store-jam for the year, right? …Right?

There is a way to make homemade chicken stock or broth where it is cheap; there is also a way to make it where it is almost free. I use a lot of chicken stock, and I have paid almost nothing for it for years.

Any time our family eats chicken or turkey, we save the bones, even if it is a roast chicken from the grocery store. Occasionally I have raw chicken bones too, but usually they are already cooked. The only time I won’t save bones is if they were cooked with a flavor I really don’t think would work in a broth. I store them in a gallon-size freezer bag that stays in the freezer (I reuse the bag over and over). Whenever the bag starts to get about halfway full, I make chicken stock.

I also save vegetable scraps in a quart-size zipper bag that also stays in the freezer and gets reused. Carrot peels and ends, onion skin and ends, garlic skin, zucchini ends, and celery ends are the main ones I save (some vegetables won’t work well for broth).

I dump the bones into the slow cooker along with the vegetable scraps. I fill the crockpot the rest of the way with water, turn on high, and leave it on about 12 hours (I’ve done it for 8 hours, I’ve done it for 24 hours; the length of time is really flexible). Let it cool in the crockpot for several more hours. Take out the big stuff and throw it away, then run the liquid through a mesh strainer to strain the rest of the scraps out. I have some plastic containers that I use for chicken broth, and I measure two cups of broth into each container (most recipes call for chicken broth in two-cup increments). For the cost of water and the electricity to run the crockpot, I now have around 20 cups of chicken stock for the freezer.

Believe it or not, I’m not a huge fan of most “freezer meals” or “crockpot freezer meals,” and I’ll get into that later. I am still open to being convinced otherwise! There are a few I do like. I am, however, a strong proponent of using the freezer to make mealtime easier — especially breakfast. I have so much more to say about freezer strategy for saving money on groceries, but I will get to that in future posts.

Do any of these freezer hacks surprise you? Which ones sound most useful for you?

Other posts in the Stretch Your Grocery Budget series:

Best breakfast hacks

(Image source)

The topic of breakfast is an important one to tackle here, because I think it is so hard to balance the health/time/cost ratios.

You may happily eat a bowl of cereal every morning and have no need for this topic. But for those of us who prefer slightly heartier options, it is a challenge to keep it cheap, healthy, and quick!

My kids are extremely active, so I can’t feed them a snack bar for breakfast and call it good. They need some serious fuel or they are going to come asking for a snack 15 minutes later. But I also don’t have time to make a gourmet breakfast from scratch every day, nor do I have the budget to provide daily bacon and eggs. I’m always on the lookout for ideas to simplify a healthy, budget-friendly breakfast. Here are some of my favorite healthy and cheap breakfast hacks.

Side note: I have four kids. When I make things in bulk, I make them in BULK. And while some things may be quick and cheap for one or two people, they become not quick and not cheap for six people. My perspective in evaluating breakfast possibilities is definitely colored by the size of our household.

Baked goods

Many baked goods freeze wonderfully. Some of my favorites are biscuits (freeze uncooked biscuits, then bake from frozen) and pancakes (freeze already cooked, then thaw).

I like to make good, hearty, healthy, homemade pancakes. It’s not like an instant pancake will never touch our lips, but if pancakes are going to be a regular breakfast, I like them to be more nutritious. More flavorful, too, since we only use maple syrup on special occasions. I don’t want to clean up syrup from sticky surfaces/faces/hair or buy expensive maple syrup in bulk. We really like eating plain pancakes as a quick grab-and-go breakfast.

When I make pancakes for the freezer, I usually quintuple my favorite recipe (it helps to have a large griddle). I make mine about 4-5 inches across so that they thaw well and are easy to handle, since we usually pick them up and eat them with our hands. Once cool, I lay them in a single layer on a couple of plastic cutting boards and set them in the freezer. Once frozen, I put them in freezer bags that I reuse. My kids can grab them on their own. Just pop them in the microwave or toaster to warm (unless you are my eldest and prefer them frozen).

Baked oatmeal is another hearty option that can easily be made healthy. Double the recipe and eat it for days, or freeze individual servings for later.

Cereal

You can’t beat the speed or cost of cereal for breakfast, especially since my two oldest can make it themselves. We try not to rely on cereal or eat it too frequently, though, because it never seems to last my kids until lunch. We are not morning snackers, and I always tell my kids to eat enough breakfast to get them to lunch. Unfortunately, cereal just doesn’t seem to have the “staying power” of some other foods (unless it is a hearty granola or oatmeal). But it is cheap and quick, and they do still eat it a couple times a week, usually accompanied by fruit.

We usually have two or three options on hand (some combination of plain rice Chex, plain corn Chex, plain Cheerios, Raisin Bran, or my cheap homemade granola). They often add a handful of raisins or frozen blueberries.

Oatmeal is also on heavy rotation in our house. Sometimes we do individual bowls of quick oats in the microwave to customize everyone’s bowl. More often I make a stovetop batch of everybody’s favorite vanilla raisin oatmeal. Even this takes no more than 10 minutes, and I can quickly get on with my day.

Yogurt parfait

Yes, it gets its own category. If I have homemade yogurt, I scoop some into a bowl with a sprinkle of nuts or granola. Add some chopped fruit (or, more often, blueberries from the freezer) and a drizzle of honey and stir. My daughter is practically made of yogurt parfaits since I ate this nearly every day while pregnant with her.

Extra protein

I have to get creative with “protein” items, because this is where the cost and time both tend to add up.

If you are getting a little tired of plain eggs, try “egg in a hole.” Use a round cookie cutter to cut a hole in the center of a slice of bread. Place it in a hot, buttered pan and crack an egg gently into the empty circle. Toast the extra circle of bread in the pan while you’re at it. Salt and pepper the egg, gently flip once it has started to set, and then remove while the yolk is still runny. Use the toasted circle to sop up any extra egg yolk.

One of my favorite items to have in the freezer is breakfast burritos. I scramble some eggs with some breakfast sausage (or whatever meat I have on hand) until just cooked. Sometimes I add vegetables like onion and bell pepper, but it’s quicker to just do eggs and meat. Let it cool, then spoon into “soft taco”-size tortillas with some cheese. Tuck one end, roll up, and freeze!

If you are rocking your tortilla wrapping technique, you can lay the burritos seam-side down on a plastic cutting board and freeze. Once frozen, transfer to an airtight container like a gallon zipper bag. If you are not a very neat burrito wrapper, you can wrap each individual burrito in a bit of plastic wrap to keep it rolled up nicely. Put these in the freezer in an airtight container without pre-freezing. They heat from frozen in the microwave.

If I have a little extra time, one of my and my husband’s favorite breakfasts is “breakfast hash,” which means I chop up a bunch of stuff and sauté it in a pan with eggs. This is a very flexible dish. It usually (but not always) involves some element of the following items:

  • Potatoes (sweet potato or regular potato)
  • Meat (usually bacon or breakfast sausage, but it can be any meat)
  • Onions (any kind)
  • Other vegetables (bell pepper? zucchini? spinach? mushrooms? Whatever you have on hand that sounds good, toss it in)
  • Eggs

If you prepare some items ahead of time (oven-roast some cubed potatoes or sweet potatoes and refrigerate till needed, for example), this dish can come together quickly. If not, just dice the potatoes smaller and give them several extra minutes to cook before adding anything else. Add the eggs at the very end and don’t overcook them. Top with salsa.

I use a very small amount of meat, just enough for flavor, to save money. I usually buy a couple pounds of ground breakfast sausage and separate each pound into 5 or 6 plastic sandwich-size zipper bags. Flatten the contents of each bag before freezing, and then you have a thin sheet of easily thawed sausage that can be tossed directly into the pan while frozen. Break it up with your spoon/spatula as it thaws and cooks. You also end up with a little extra grease in which to sauté your vegetables (I usually end up adding more oil, though).

You can also make a large breakfast casserole (with lots of vegetables!) for the fridge and reheat individual servings throughout the week.

These are not the only things we ever eat for breakfast, but I hope it gives you some ideas if you are in a rut. Do you have any favorite quick/cheap/healthy breakfast hacks?

Other posts in the Stretch Your Grocery Budget series:

dairy milk

(Image source)

Creativity and a little strategy with dairy items is one way I can really save on our grocery budget. How many of us have little containers of sour cream or cottage cheese languishing in the back of our refrigerator because we bought it for a recipe and only used half of it?

Our family has gone through periods of avoiding dairy, particularly when my oldest son was lactose-intolerant for the first five years of his life. If that is you, I will address dietary restrictions in another post. Stay tuned for that!

Substitute

One of the most important things when it comes to saving on milk products is to be flexible. (I see you over there, you with the horrified look and quizzical brow. Just take a deep breath and release your death grip on that recipe.) Don’t be afraid to substitute. If you get a good sense of what you can substitute in different contexts, then you don’t have to buy six different dairy items that barely get used and then sit in the back of your fridge until they finally go bad. For example, we rarely have sour cream on hand. But you can substitute yogurt (Greek or otherwise) in most recipes. We also use plain yogurt instead of sour cream for topping our Mexican food, chili, curries, etc.

I often buy the actual item, but in a pinch, here are some common substitutions I make based on what I have and what I need:

  • If you don’t have sour cream:
    • Plain regular yogurt
    • Plain Greek yogurt
  • If you don’t have buttermilk:
    • Regular milk with a splash of lemon juice or vinegar to sour it
    • Whey
    • Almond milk with a splash of lemon juice or vinegar to add tartness
    • Yogurt thinned/mixed with water
  • If you don’t have milk (for cooking, not drinking):
    • Whey
    • Almond milk
    • Yogurt thinned/mixed with water
    • Cream or half-and-half thinned with water
    • Any other thicker dairy product thinned with water
  • If you don’t have half and half or cream (for cooking):
    • Yogurt mixed with milk
    • Milk mixed with a little bit of extra butter/oil
  • If you don’t have yogurt:
    • Sour cream
    • Cottage cheese

And I rarely have exactly the kind of cheese a recipe asks for. I substitute cheeses right and left. It may change the flavor slightly, but it’s usually a delicious substitution.

Use it anyway

Has your milk gone sour? Did you find a spot of mold in your yogurt? Don’t throw it out! You can still use expired dairy for baking, as long as it hasn’t gotten really nasty. Get rid of the moldy spot (if there is one) and proceed as usual. The heat of the baking process will take care of it just fine, and you will never know the difference.

Freeze it

Many dairy items can be frozen easily, so if you find a good sale, buy a few extra and stick them in the freezer! For example, one time I found goat milk on sale at a local discount store for $0.99 per quart. My then-lactose-intolerant son could tolerate goat milk in baked goods. You’d better believe I bought 10 of them and stuck them in the freezer! Note: Yogurt does not freeze well.

We’ll dig into this freezer topic a little further in a later post.

Make it

Sometimes it really is cheaper to make it yourself. Making my own yogurt saves us a lot of money. Click here to go to the recipe. Plus, you end up with a lot of whey, which can be used in many ways.

I have only made ricotta once or twice, but you can make it in the microwave out of milk and lemon juice.

As mentioned in the substitutions section, you can make a buttermilk substitute by adding a splash of lemon juice or vinegar (preferably apple cider vinegar or white vinegar) to regular milk and letting it sit for a few minutes.

Do without

Did you know that you can use water instead of milk in my favorite cornbread recipe and it still turns out delicious? You can also use water instead of milk in my favorite bread recipe and it still tastes amazing (because HOMEMADE BREAD). If you’re making macaroni and cheese, then you obviously can’t use water instead of milk (though I have used whey!), but when baking, be willing to try substituting water for milk and see if you notice a difference. You might. But you also might not, and if it is something you make a lot, it can really add up over time.

Do you have any other tips and tricks for saving money on dairy products?

Other posts in the Stretch Your Grocery Budget series:

Meal planning strategies to save you money - bonjourHan.com

(Image source)

I’m actually not going to tell you how to meal plan. Everyone’s circumstance is so different, and different methods work better with different personalities, and I myself have changed my “method” so many times over the years because I kept needing to flex with what would work best for us in that season of life. I honestly still haven’t landed on a “method” that I love.

That being said, the basic bones of what I have done the majority of the time is to plan out several dinners for the time period (week, biweek, or month), but not every single dinner (leftovers are awesome, guys, and so are spontaneous dinners out with friends). I get what I need for those meals, and then I have a list of things I can make. I pick from the list based on whatever I need to fit my circumstances that day. Things come up, and I don’t want to be locked into a specific meal for a specific day. I will maybe plan a few specific breakfasts and lunches for that time period, but otherwise I just get some staples and we figure it out as we go for breakfast and lunch (more on breakfast and lunch in later posts).

BUT this post is not about meal planning methods. I just figured it would be helpful to know what I do for context. Nor am I getting into specific ideas yet. This post is more about some higher-level strategies to keep in mind before you sit down to plan meals.

Overlap ingredients

Just a quick word on this: Try and overlap ingredients so that you’re not buying single-use items. If you really need Swiss cheese for something, incorporate Swiss cheese into a couple of other meals as well. If you buy pesto for pasta, maybe also use it in an omelet another day and to season some chicken another day. It can help save money when you use ingredients across several meals.

Seasoning, not stuff

Avoid high-dollar ingredients and stick with cheap, flavorful seasonings.

Guys, I cannot say this enough. Get to know your seasonings. Seasoning does not mean spicy. It just means flavorful! Instead of smothering everything in cheese ($) or cream ($) or fill in the blank ($), give your food flavor from other things. Don’t be afraid to use a lot of seasoning! It doesn’t mean you can’t use cheese or sour cream, but don’t rely on them for flavor.

Honey, for example, is an expensive ingredient. Marinades or sauces that require more than a couple tablespoons of honey are an automatic “no” in my book. That “sticky honey chicken drumstick” recipe looks delicious, but I’m not going to use $7 of honey just to add flavor to my chicken.

There are a lot of herbs and spices in the world, and even more ways to combine them. I love the creativity that invites, but you might not. It does not have to be intimidating, though. This goes back to what I said in this post about learning how to do a few things really well. Find a couple of marinades or seasoning combinations that you really like, and perfect them. (I’ll be posting my favorites later.) You don’t need to “kind of” know 10 chicken marinades. Have 1 or 2 no-fail staple chicken marinades that you know are delicious, and you can use that chicken for all kinds of things.

The beautiful Central Market wall of bulk herbs and spices is my happy place, but we don’t have one here in Kansas City, so now I get my bulk spices from Sprouts. I buy all my spices in bulk. For some, the benefit is buying exactly what you need (a baggie of dried dill for $0.15, anyone?) rather than a whole jar of a spice you may only use once or twice. For me, the benefit is paying a tiny fraction of the cost for large quantities of spices I know I will use over and over. It is so much cheaper.

Vinegar is another cheap, flavorful addition to amp up the flavor. Dijon mustard, balsamic vinegar, apple cider vinegar, and rice vinegar (I make a lot of Asian dishes) are some of my staples that I almost always have on hand.

As you plan your meals, try to add up the approximate cost of all the “flavor” items. Is it surprising? Think of how much “actual food” you could buy with that money. Do what works for you; I’m not trying to guilt anyone into never making honey chicken ever again. And you don’t need to say goodbye to cream cheese forever, but a general awareness of the cost of “flavor” items can help you better manage where your money goes. (I will always and forever make homemade tzatziki sauce to go with my already super-flavorful chicken shawarma because I am not a monster.)

Please hear me: I am not saying “Eat boring food.” I am saying, make amazing food without the $$ ingredients!

Herbs, spices, and vinegars are your secret weapon. Use them!

Staple recipes

Beyond your meal plan, it is helpful to have some staple recipes you can whip up in a pinch that don’t call for “special” ingredients but rather pantry ingredients you might already have on hand. (Think snickerdoodle cookies, balsamic roasted chicken, or vanilla raisin baked oatmeal.)

For one, you won’t have to go out and make a special purchase, which is particularly helpful in a time crunch. For two, vanilla and cinnamon are much cheaper per use than chocolate chips ($), pecans ($$), berries ($$), cream cheese ($), maple syrup ($$), heavy cream ($), caramel ($), etc. Some of these items are still fairly cheap, but it’s helpful to have some staple recipes that don’t require ANY extra items.

At the grocery store

Your job isn’t done once you have made up your grocery list.

You can also get to know the general cost of things at many grocery stores around you, and know your bottom line. For me personally, I will not pay more than $2/lb for chicken, because I know I can almost always find it for that price somewhere. I will not pay more than $1/lb for apples, so if apples are more expensive than that, I just don’t buy apples. I’m not being stubborn. It just takes that kind of strategy to make sure my budget can stretch all the way to the end of the month while still feeding my family well. This is where being flexible and using substitutions comes in. If I need to make a very specific dish for a specific reason, then I will just go ahead and pay for the apples. But otherwise, I will flex. This can throw a wrench into many people’s idea of a “meal plan,” haha!

Familiarizing yourself with general prices at the stores around you can also help you strategize which things to buy at which store. Back in Texas, we just made a morning of it every two weeks and went to all three of our regularly frequented grocery stores to get what we needed for that time frame. Now, we make more frequent smaller stops when we happen to be near one of the grocery stores.

A few weeks ago I threw caution to the wind and tried to get everything I needed for about a week’s worth of meals all at one store, and it ended up costing about 1/3 more than I was expecting. Oops. It was a pretty tight stretch after that. Some people really value being able to stop at one place and get all their grocery shopping done, and that’s great! But the cost savings makes it worth it for me to split my shopping between a few different stores.

I realize much of what I have said here is pretty broad or vague, so I will get into many more specific recipes and tips and tricks in later posts. I have so many things I can’t wait to share with you! This is just to give an overview of a few concepts I try to consider when I plan our meals. These things won’t all work for everyone, but maybe they will give you something to think about. Was anything surprising to you?

Other posts in the Stretch Your Grocery Budget series:


Homemade yogurt is so easy in the slow cooker! ~ bonjourHan.com

We eat a lot of yogurt.

  • We eat it as a snack plain or mixed with cinnamon
  • We eat it for breakfast mixed with thawed frozen blueberries, a sprinkle of nuts or granola, and a drizzle of honey
  • We eat it as a sour cream substitute on top of our food
  • We bake with it
  • We use it in tuna salad and chicken salad to lighten up the mayonnaise
  • We mix it into curries to cut the spice for the kids
  • I’ve even used it as an emergency substitute for milk when baking (more to come on that)

Several years ago I started making my own yogurt, and it has saved us quite a bit of money. This recipe yields a lot of fresh yogurt, plus a quart or two of whey, depending on how thick I want my yogurt. Because of the return, I usually feel okay spending the extra for organic milk (around $6 for a gallon around here). This can be even cheaper if you don’t use organic milk. I have done both.

Ingredients

If you don’t go through absurd amounts of yogurt like we do, you can easily half the recipe.

  • 1 gallon of whole milk
  • 1 cup of plain yogurt (Greek or regular)

Look at the ingredients on the yogurt and make sure it includes “live and active cultures.” That is what is going to turn the milk into more yogurt. Once I actually used whey from a previous batch of yogurt when I realized last-minute that I didn’t have any actual yogurt, and it worked! But I only tried it once, so you’re welcome to try it, but maybe get a few successes with the actual recipe first.

Directions

  1. Pour the whole gallon of milk into the slow cooker and replace the lid. Turn on LOW for 3-3.5 hours. I usually set my phone alarm to go off rather than using a timer.
  2. At that point, turn the crockpot OFF but don’t remove the lid. Just leave it alone (with the slow cooker OFF) for 3-4 hours.
  3. After that, ladle out about a cup of the warm milk into a 2-cup measuring cup. Add the 1 cup of yogurt to it and whisk to combine. Pour this mixture back into the slow cooker and whisk.
  4. With the slow cooker still OFF, wrap a bath towel around the slow cooker and place another bath towel on top of the slow cooker. The towels act as insulation so the milk can culture into yogurt. Leave it alone for about 9-12 hours (I aim for about 10).
  5. Place a large colander over a bowl to collect the whey (the wonderful liquid that drips out). Line the colander with two layers of cheesecloth and strain the yogurt on the countertop for 1-3 hours depending on how thick you want it to end up.
  6. Transfer the yogurt into a container and refrigerate. Pour the whey into a jar and refrigerate. You can use the whey in baking as a delicious substitute for water or milk. I have even successfully used it instead of milk to make macaroni and cheese.

It may seem complicated, but once you make it a time or two, it will seem SO EASY. I have gotten into a rhythm where I can make it with minimum dishes and effort. For example, after pouring the whey into a jar, I use the bowl that previously held the whey to wash the cheesecloth. I fill it with dish soap and water, swish the cheesecloth around, then swish it in clean water a few times to rinse. Then both the bowl and the cheesecloth get clean.

You also need to think about when you are going to start; you don’t want to get partway through and realize you are going to have to wake up in the middle of the night to turn off the crockpot or mix in the yogurt (let’s pretend I have never done that). I usually start the process around 3 or 4 in the afternoon. That way, it cultures overnight and it’s ready to strain in the morning.

Do me a favor and don’t taste the yogurt until it has been chilled in the refrigerator. Room-temperature yogurt is not the best way to taste your success.

What are your favorite ways to eat yogurt?